mix space 前端+后端教程-4.19

mix space 前端+后端教程-4.19
其实我之前写过这个mix space的教程,但是那一版当时写的有些草率所以现在来重新写一下
建议看完一遍再开始操作
准备:
1.一个脑子
2.一台linux服务器,服务器内存不小于2g
我这里演示系统用的是ubuntu 24
正文:
环境配置:
1.先在服务器里安装好宝塔面板,然后配置好docker和nginx环境
2.刷新系统包缓存与安装常用/必备软件包
1 | apt update && apt install git curl vim wget git-lfs -y |
3.Ubuntu 安装依赖环境
1 | sudo apt update && sudo apt install git curl vim wget git-lfs -y |
4.安装依赖环境
依次运行下面两个指令
1 | sudo su |
1 | npm install -g pnpm pm2 |
如果第二个指令下载过慢可以使用这个指令切换镜像源
1 | npm config set registry http://mirrors.cloud.tencent.com/npm/ |
5.安装 NVM
1 | curl https://raw.githubusercontent.com/creationix/nvm/master/install.sh | bash |
6.运行 source ~/.profile 命令将环境变量重新加载到当前会话中。
1 | source ~/.profile |
7.列出 Node.JS 的可用版本。
1 | nvm ls-remote |
8.确定版本后,运行 nvm install version 命令下载并安装它。例如,安装 Node.JS 20.12.2 , 强烈推荐 V20.12.2 版本
1 | # 安装nvm install 20.12.2# 检查版本node -v |
9.安装 pnpm pm2
1 | npm install -g pnpm pm2 |
10.安装 sharp
1 | npm i -g sharppnpm add sharp |
安装后端
先创建个文件夹
1 | cd |
1 | mkdir -p mx-space/server |
1 | cd /root/mx-space/server |
然后wget一下两个文件
1 | wget https://fastly.jsdelivr.net/gh/mx-space/core@master/docker-compose.yml |
下载好后去编辑docker compose 文件可使用finalshell,宝塔在线文件管理编辑文件
在 environment 字段填入对应内容,使其符合 yaml 语法,保存即可。
如果你后续的主题是shiro记得把
image: innei/mx-server:latest改成image: innei/mx-server:10因为shiro只适配到10.x版本
JWT 密钥:JWT_SECRET:需要填写长度不小于 16 个字符,不大于 32 个字符的字符串,用于加密用户的 JWT,务必保存好自己的密钥,不要泄露给他人。被允许的域名:ALLOWED_ORIGINS:需要填写被允许的域名,通常是前端的域名,如果允许多个域名访问,用英文逗号,分隔。是否开启加密:ENCRYPT_ENABLE:如果你确定要开启加密,则在配置文件中加入对应内容,开启加密后,你需要在下方填写加密密钥。加密密钥:ENCRYPT_KEY:如果你不知道这是什么,那么不建议开启此功能,具体内容可参考 Key 加密与安全性 关于 JWT 密钥可以使用 MD5 转换将你熟悉的文字加密作为 JWT 密钥 域名通常为前端域名:例如
 www.glsaone.xyz,glsaone.xyz,localhost loacalhost 作为 前端Api 调用需填入
在相关内容填写完毕记得保存
随后拉取最新的镜像
1 | sudo docker compose pull |
启动容器
1 | sudo docker compose up -d |

这样就代表容器启动成功了
接下来打开宝塔面板,到网站里配置反向代理,先自行解析一个域名到服务器里
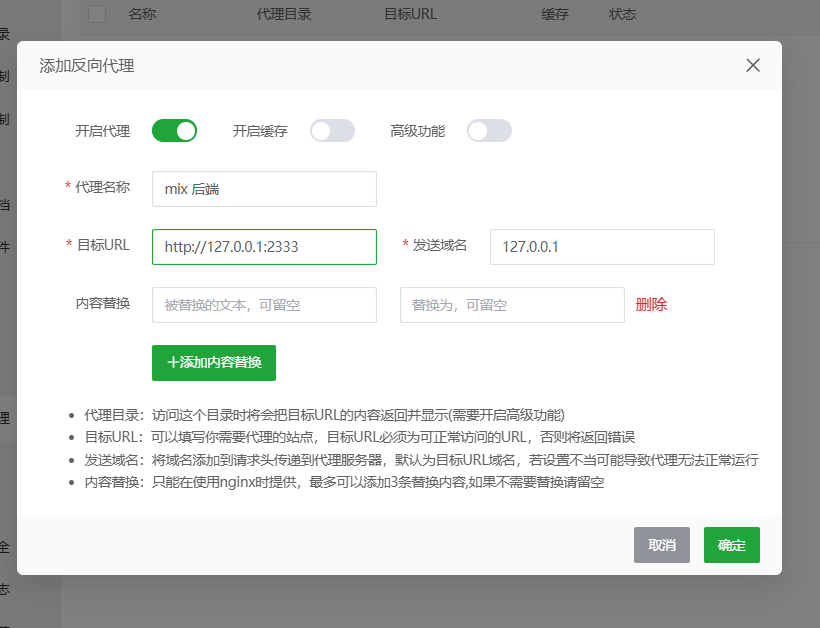
就像这样设置反向代理到2333端口,后续记得打开2333端口作为后端
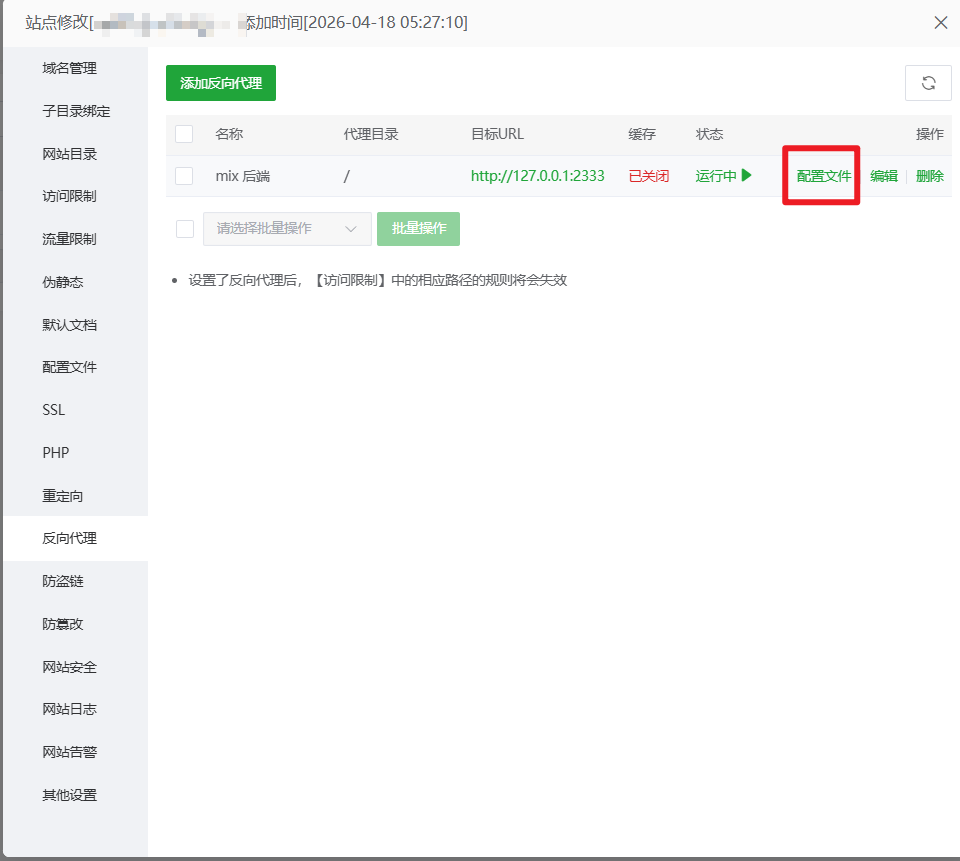
这里填写好后到上一个界面,点击配置文件修改里面的配置文件为以下内容
1 | ## 反向代理开始 |
这时你的域名加上/proxy/qaqdmin就可以访问后端了
像这样后端就搭建完成了,根据文字一直点击下一步即可
安装前端
进入到你服务器的ssh
先进入文件夹
1 | cd /root/mx-space |
创建文件夹
1 | mkdir shiro |
再运行以下两个指令wget文件(记得cd进去)
shiro进入维护状态了,官方md文档中的两个wget都有问题所以我这里贴我自己的链接
1 | wget -O docker-compose.yml https://dl.xp6.top/down.php/da6c8f95728461dd73a8cb1aa6b27fb3.yml |
1 | wget -O .env https://dl.xp6.top/down.php/f661b65565f853bd2e0cdfc8577c8350.env |
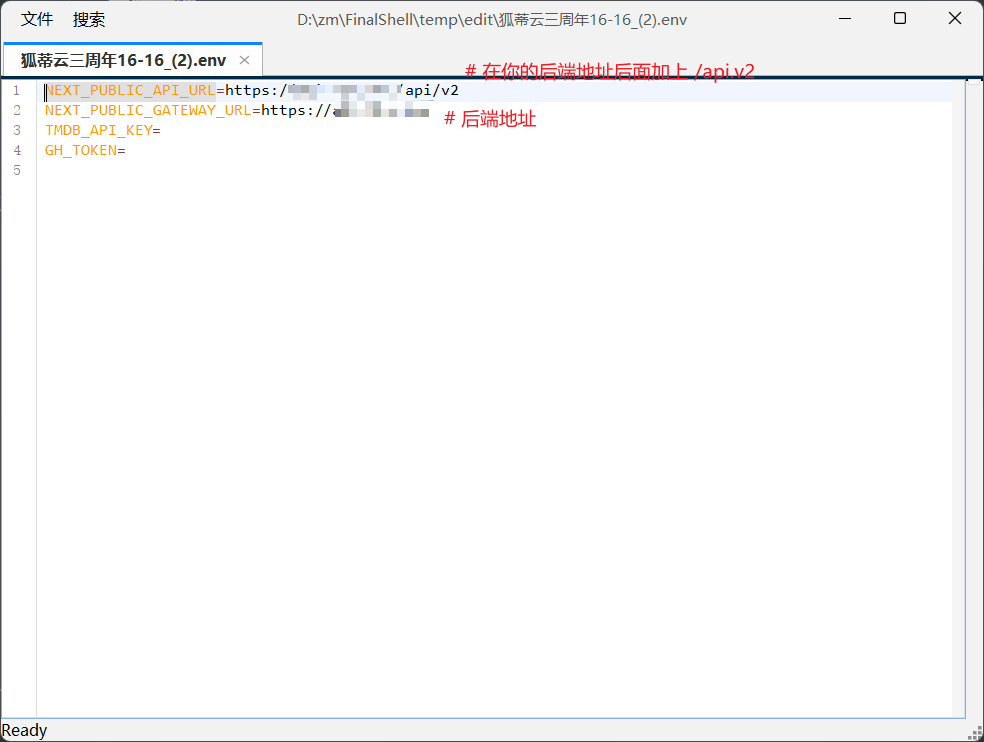
随后修改.env文件,多余的两行删掉即可
最后
1 | sudo docker compose pull |
1 | docker compose up -d |
启动前端即可
接下来去配置前端的反代,和上面的一样把端口改成2444就好了
配置文件改成这个
1 | location ~* \.(gif|png|jpg|css|js|woff|woff2)$ { |
最后再去修改后端里的云函数
在后台配置云函数
进入 Mix Space 后台,进入「配置与云函数」页面,点击右上角的新增按钮,在编辑页面中,填入以下设置:
请注意,这份配置你需要自行修改成符合你的需求的配置。直接使用下面的配置可能会导致你的博客无法按照你的预期运行。
下面的配置可能不全,更多配置项的信息请移步配置项了解。
此外,配置也可写成 YAML 格式,此时数据类型应选择 YAML
- 名称:shiro
- 引用:theme
- 数据类型:JSON
- 数据:(点击下方的按钮复制)
1 | { |
然后点击右上角的保存
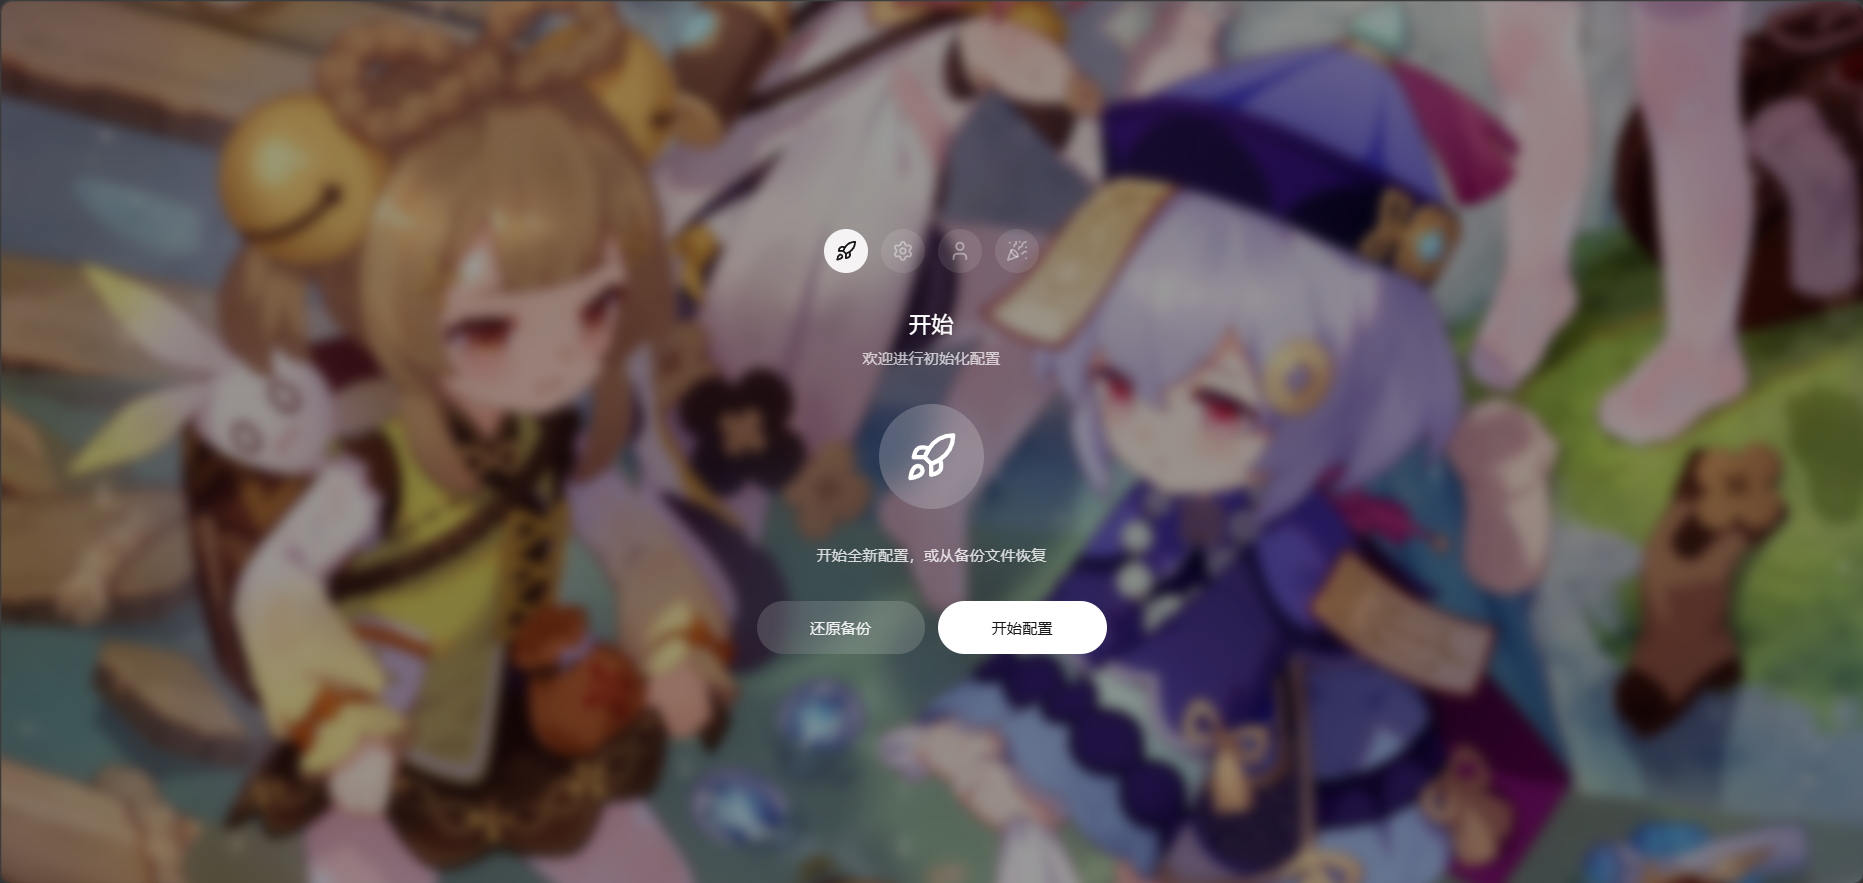
现在你就可以访问你的前端了
可能你跟着教程走都会遇到些许问题玄学真的好多!!
前期的环境配置借鉴了了些龙司的小窝里的内容
- Title: mix space 前端+后端教程-4.19
- Author: ZXEB
- Created at : 2026-04-19 02:17:03
- Updated at : 2026-04-19 02:50:33
- Link: https://zxeb.github.io//posts/云服务器/91
- License: This work is licensed under CC BY-NC-SA 4.0.